Welcome to your new, improved and expanded business!
We are not kidding.
Having a CRM like Intellent is one of the best business decisions you have ever done. Why?
Because you now have a super-easy-to-use, no-learning curve system that you can set up in under 5 minutes and fully organise your business and your life – capture leads, transform them into clients, manage them, monitor your operations and so much more.
Enough with the talk, let’s walk!
You are probably one of those types:
- You have an established business with customers
- You are starting now and have no customers
If you are an established business with customers: #
You must upload your current customers using Excel, Google Sheets, or any other software. This is the very first step. We will deal with configurations later:-)
So step 1: Export your customers in a CSV format.
Step 2: Format the CSV based on this sample:
TIP: You can use ChatGTP or any other LLM (Claude, Gemini, DeepSeek or Perplexity) to format your customers based on this sample.
Use this prompt: “I will upload a sample CSV and my current list of customers. Please add all my customers in the format of the sample CSV and export it as a CSV for me to download”
It’s that easy!
As soon as you have your customer’s file, all you have to do is:
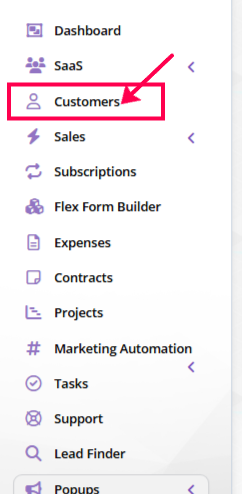
- Navigate to the Customers tab on the left-hand menu and click it:
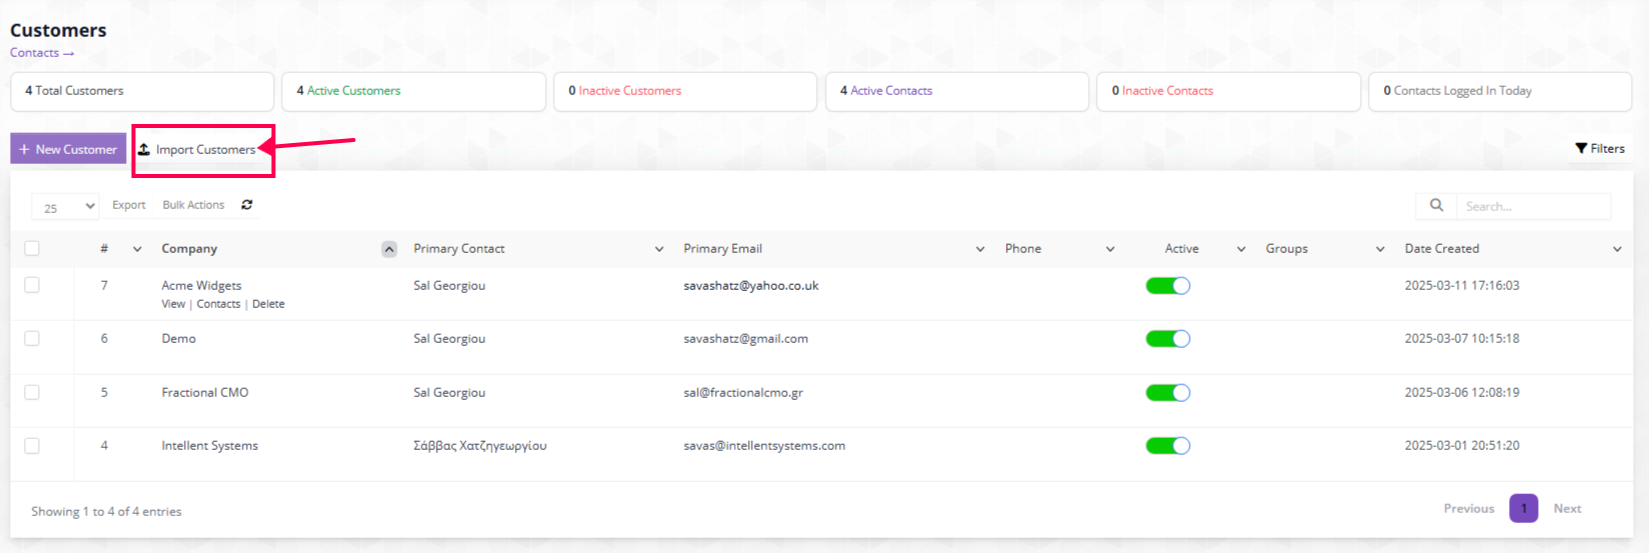
On the new screen that loads, click on the “New Customers” option:
Then, simply click on the little button that says “Choose File“, find your customer’s CSV file and upload it. Click Import…. and 🥁🥁🥁
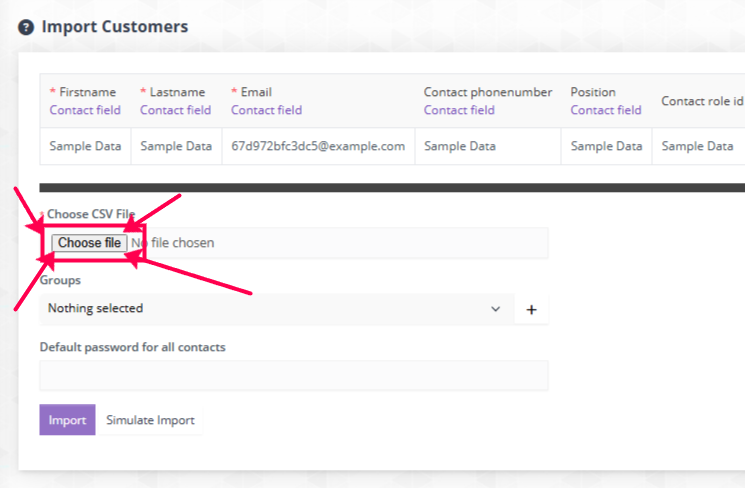
Ok, we overdid it a bit with the arrows…
Next, refresh the page to show you all customers – and that’s it!
What if you don’t have customers and you are a startup (or not, but either way you have no customers): #
Ok, this is a bit more complicated. What you need is to bring in leads, which are then transformed (no, not magically) into customers.
For that, you will need to plaster (or pepper?) your website, social media, and emails with forms and calls to action.
Why forms?
Well, because there is the simplest way to add names and emails to your Leads section, and then start Marketing Automation.
We have three types of forms (they are all the same, but what changes is the design).
- Web To Form (located in the Setup>Leads>WebTo Lead
- Form Builder, which is more of a quiz set up with different screens
- And Leader Form, which is integrated with Facebook and Google |easier”
This Quick Start guide is all about fast and efficiency, so we will start with Web To Form.
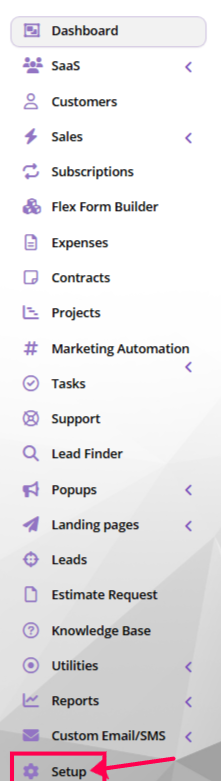
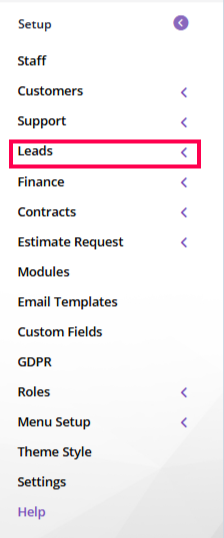
To create your first, easy form, go to Setup, at the bottom of your left-hand menu:
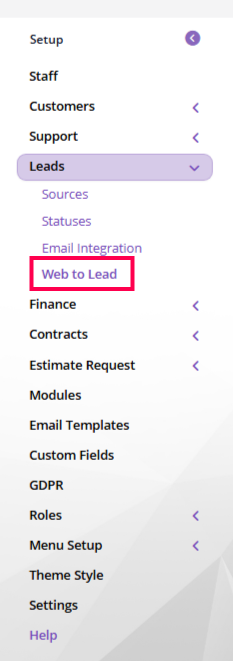
Click Setup (as above) and your menu will change and become this one below – in which you need to click Leads, to open the submenu:
Then click “Web To Lead” to open the web form setup:
Click New Form.
Now, after all these, there is a form builder, however, we need to first specify what our form is all about. So you will see this screen:
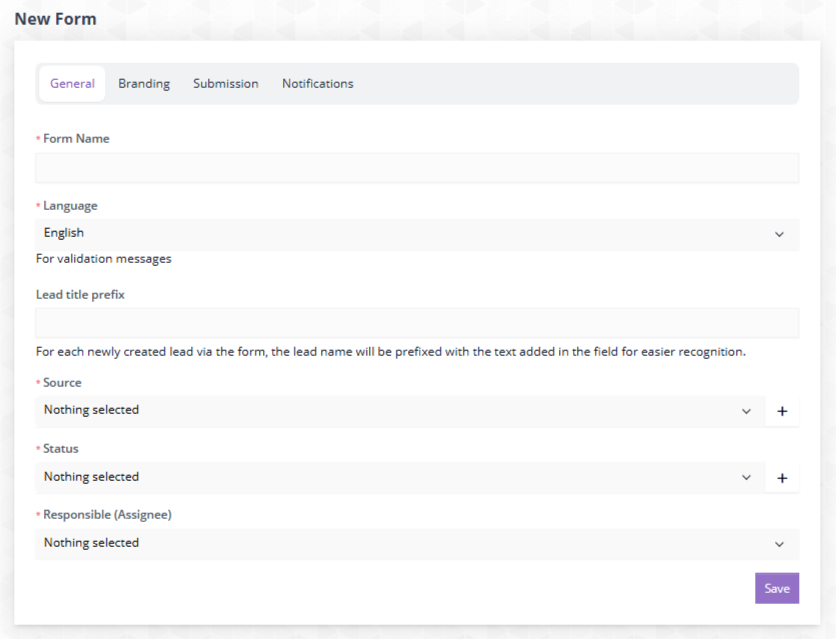
Ok, let’s start exploring, shall we?
Give it a name, in the Form Name, i.e. Capture Leads
Then you need to specify what language you need to display when a user makes a mistake or completes the form (validation messages)
Then if you want, and for better lead management, you can add any prefix you want which will appear in front of every lead. This helps with segmentation later where you can ask the CRM to bring you all leads starting with i.e. LD (short for leads). You can have a short name of the page you will have the form i.e. cp (contact page) or anything else you want. Leave it empty, if you do not give a damn at this moment.
Then, very important: to add the source, where these leads are coming from. This is particularly helpful, if you position this on a page with the sole purpose of driving Facebook traffic for example. Simply select the source you need and the “+” on the right of the dropdown, allows you to add new sources on the fly. For example, let’s say I am building a landing page, and I will have mixed traffic. I will click the “+” and write “Landing Page”.
Later on, you can draw all leads on the reporting tool, based on the source, so every lead that came from the landing page will be displayed (and you can send them specific emails, add them to remarketing lists, you name it.
Then, add the Status of the leads you will be gathering – it can be anything, we simply added, Lead.
And then who will be responsible for those leads, so we added our boss, Sal.
Take a look here:
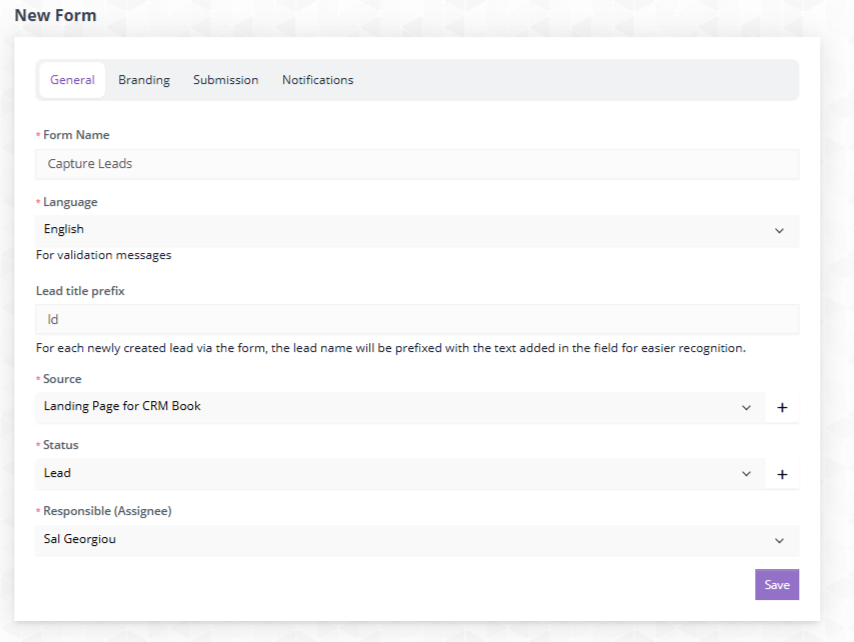
Click Save to move to the next part, Branding.
On Branding tab, you can change the text of the Submit button to anything you want. Obviously, we didn’t like the word Submit so we changed it to “Yes, I want my free book!
Underneath, you can change the background colour of the button – we selected a nice red (not wine, but you get the point) and then white for the background text.
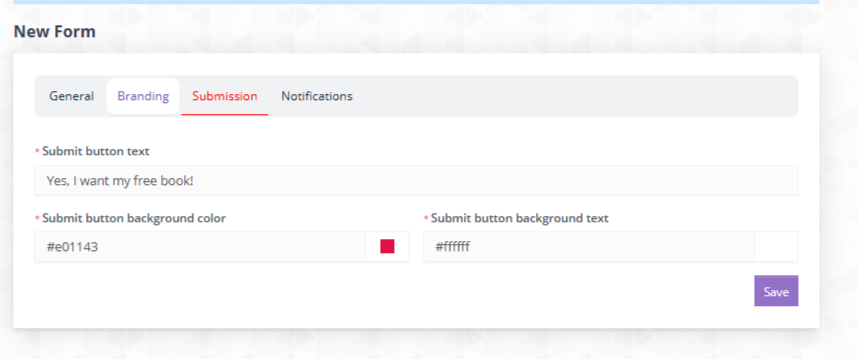
Click Save and move to Submission.
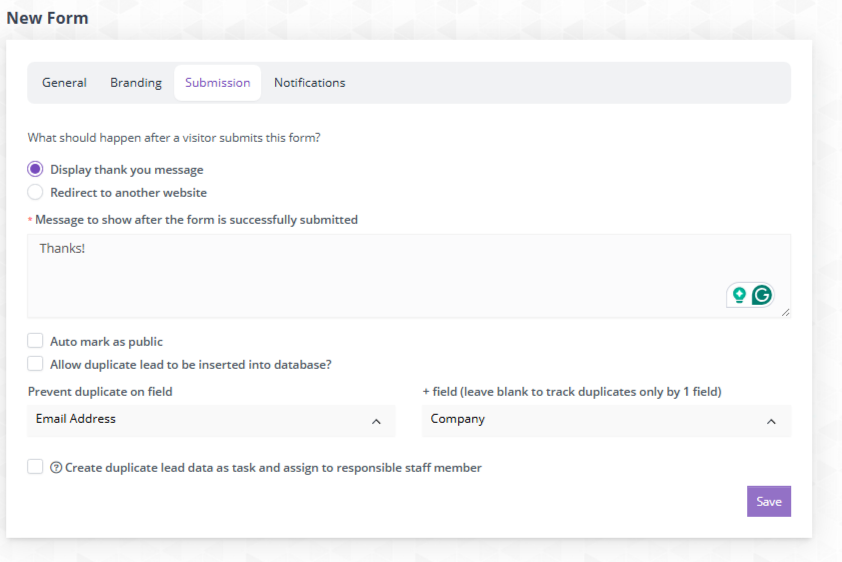
At the Submission tab, you have two options:
- To simply display a thank you message once someone filsl the form and submits his info (easy)
2. To redirect him to another page (more difficult, as you need to have set up another page). What is the reasoning behind the redirect? Well, if you are an advanced marketer or business owner, you may have planned your lead journey and delivered different messages at different stages. So i.e. Stage One, someone fills out the form, and in Stage 2, they are redirected to another page where they can download something, watch a video, book a meeting, print a coupon, you name it.
Leave Automark as public as is.
Now, a critical step. Do you want to allow someone to submit the form with the same email (or name or otherwise)? We only want genuine leads, so we won’t allow that. So untick that box and now you see the following:
- Prevent duplicates on which field? Name, position, email phone etc? Obviously for us we want unique emails, so we select that.
- Do you want another field to prevent that, i.e unique emails from the same company – for example, allow unique emails like john@acme.com and Margaret@acme.com from Acme only.
Untick the Create duplicate lead data as task…etc
Click Save
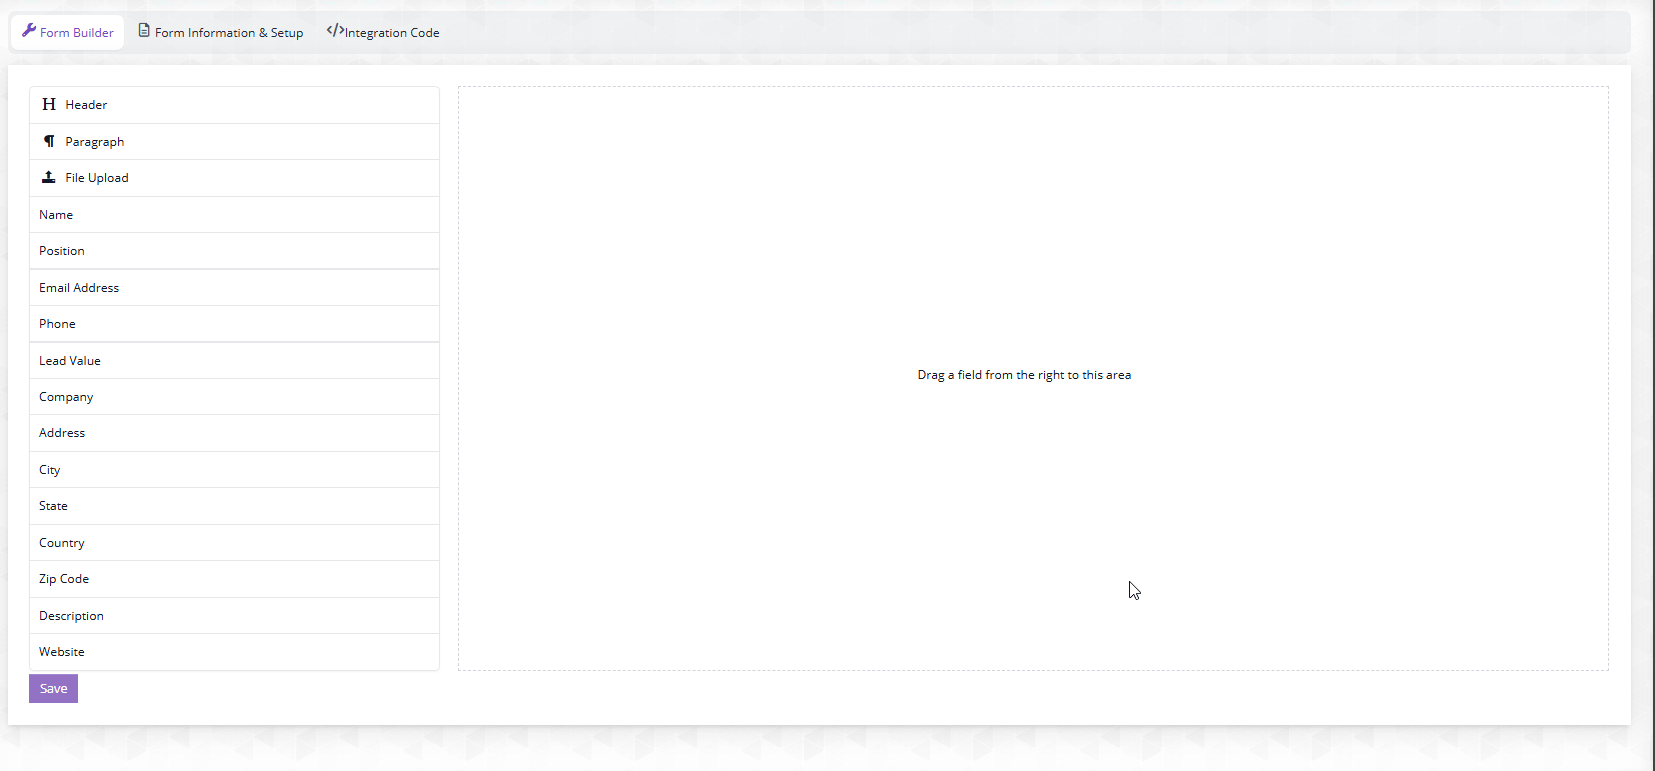
Once you do that and click Save you will be transferred to the email builder.
Start building your form by drag and drop. Marketing-wise, the more fields you have, the less people will complete it, so we will be sticking with just a name and email, in order to be able to personalise our emails later with “Dear Jane” or whatever the lead’s name is.
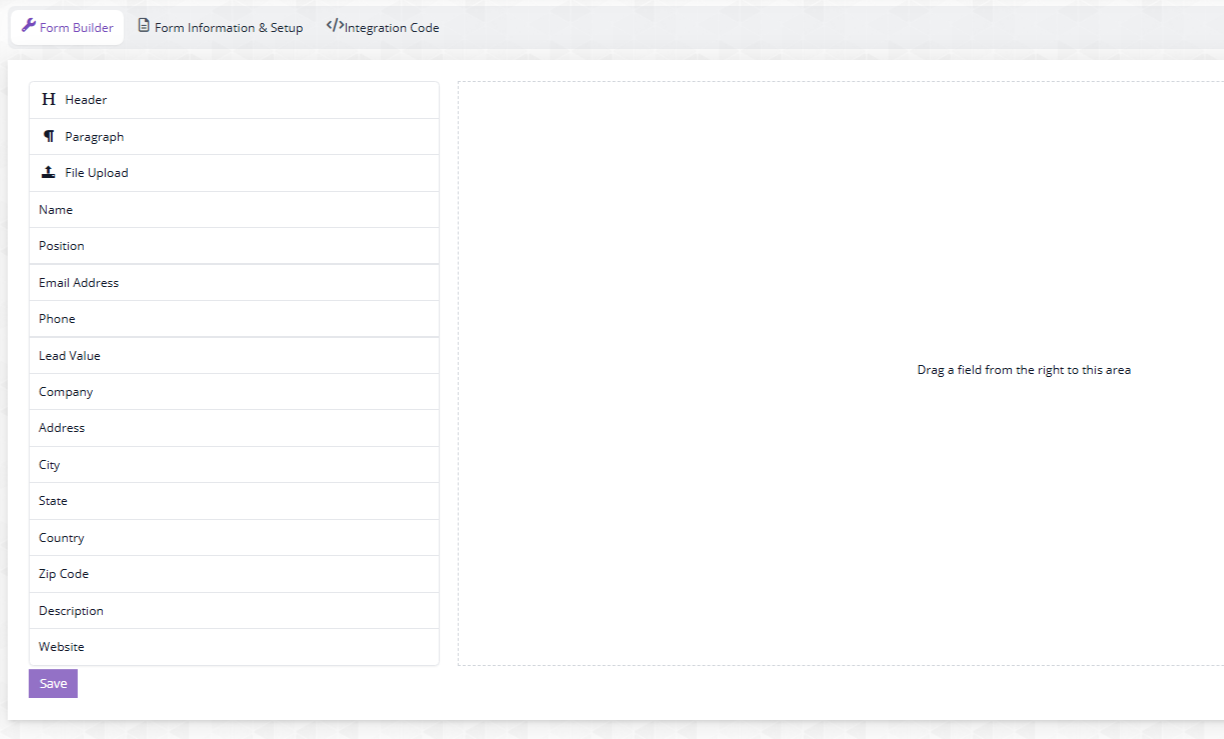
Here is how:
Once you are happy, click Save and then click the “Form Information & Setup” above the form, just to verify everything.
Once you are done, click the Integration code and it’s time to enter it into your website!

If you are active on social or simply want to send the form to someone to fill it out, use the direct link below (obviously, test it first on an incognito browser to check it)
And that’s it! This is step nr. 1 to get started with Intellent CRM.
Next part: Configuration


Add a Comment
You must be logged in to post a comment